
Estimated reading time: 8 minutes
How to Prepare AI Content for WordPress Import
AI can help you produce blog posts faster, but WordPress import can get messy if the content is not prepared correctly. Bad formatting, broken HTML, missing metadata, oversized images, and copied styling can turn a good AI article into a cleanup job.
Quick answer
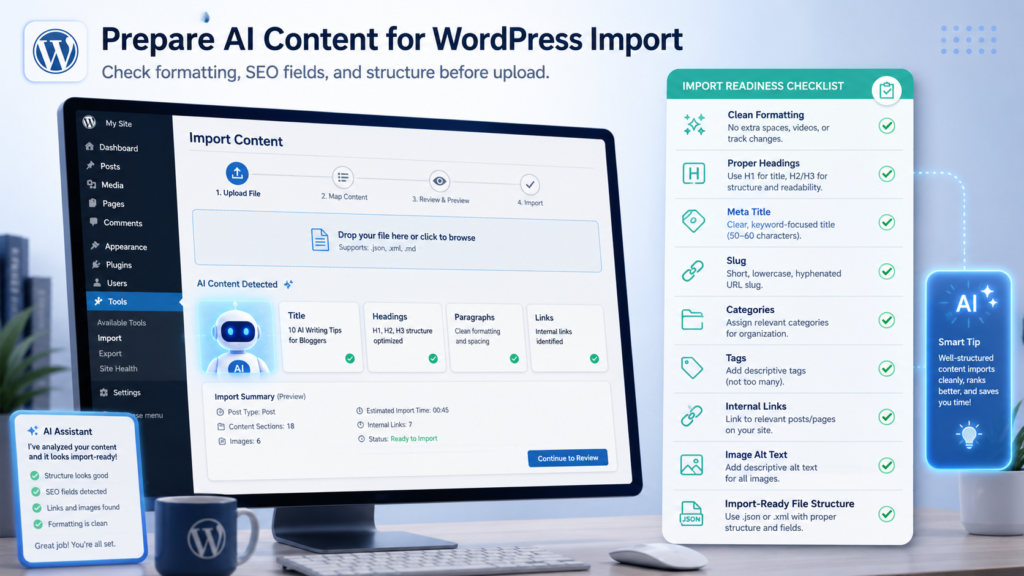
To prepare AI content for WordPress import, organize the article into clean sections, remove messy formatting, convert headings into a clear H1/H2/H3 structure, prepare SEO metadata, compress and rename images, check internal links, and paste or import the content using the right WordPress method. For HTML-heavy content, WordPress supports Custom HTML blocks, and the block editor can also show a full post in code view for editing markup. WordPress explains that the Custom HTML block is designed for adding raw HTML to a post or page, while the block editor stores content as block markup that WordPress parses when rendering the page.
The real problem
Most AI content is not import-ready. It may look finished in a document, but WordPress needs clean headings, safe HTML, image data, links, categories, tags, and SEO fields.
Why it matters
A sloppy import can create broken layouts, duplicate titles, missing alt text, weak SEO snippets, and pages that look different on mobile than they did in your draft.
What this guide gives you
You’ll get a practical preparation workflow for turning AI-generated articles into clean WordPress-ready content that is easier to paste, import, format, optimize, and publish.
Soft internal link suggestion: Link this article to a future post called “The AI Blog Publishing Checklist for Beginners.”
Why AI Content Needs Cleanup Before WordPress
AI-generated content often feels ready because the writing is complete. But publishing is not only about words. WordPress needs structure. Search engines need metadata. Readers need clean formatting. Mobile users need simple layouts. Your future self needs reusable content that is easy to update.
WordPress content can be edited through the block editor, and the editor can show the full post or page in code view. For individual raw HTML sections, WordPress also offers a Custom HTML block that lets you add HTML code inside a post or page. That means AI content can work well in WordPress, but only when the markup is clean and the content is prepared before import.
Simple rule
Do not import AI content as one giant blob. Prepare it as a publishing package: title, slug, meta description, categories, tags, clean sections, image ideas, alt text, internal links, and final checks.
Step 1: Choose Your WordPress Import Method
Before formatting the content, decide how it will enter WordPress. The right method depends on how many posts you are publishing and how much formatting you need to preserve.
Manual paste
Best for one post at a time. Paste into the block editor, then review headings, spacing, links, images, and SEO fields manually.
Custom HTML blocks
Best for styled article sections, landing-page style blocks, comparison cards, and reusable visual layouts.
Bulk import
Best for many posts. Use CSV, XML, plugin-based import, or WP-CLI workflows when you need to migrate or publish content at scale.
WordPress’s WP-CLI import command provides a command-line interface to the WordPress Importer plugin for importing WXR files, which is useful for migrations and larger content workflows.
Step 2: Separate the Article From the Publishing Metadata
One of the biggest mistakes creators make is mixing the article body with SEO notes, image prompts, social copy, and publishing instructions. Keep those items separate so they do not accidentally appear inside the live article.
Your AI content package should include:
- Better title
- SEO title
- URL slug
- Meta description
- Focus keyphrase
- Related keyphrases
- Suggested category
- Suggested tags
- Article body
- Image suggestions and alt text
- Social media copy
- Final publishing checklist
Step 3: Clean the Heading Structure
AI tools sometimes overuse headings or create heading levels that do not make sense. Before importing, check the structure:
Use one H1 only. This is usually the post title.
Use H2s for major sections such as steps, comparisons, tutorials, mistakes, and FAQs.
Use H3s for subpoints inside an H2 section, such as checklist items or examples.
Warning card: do not paste messy document formatting
Copying from Google Docs, Microsoft Word, or an AI chat window can bring hidden styling with it. If the layout looks strange after pasting, use plain text first, then rebuild headings and cards inside WordPress.
Step 4: Prepare HTML Sections the Smart Way
If your article includes styled HTML sections, keep each section self-contained. Avoid full-page HTML such as <html>, <head>, and <body>. WordPress posts already live inside a theme, so your article only needs the content blocks.
Clean HTML section checklist
- Use
<section>wrappers, not full-page HTML. - Keep inline styles simple and mobile-friendly.
- Use readable spacing, border radius, and contrast.
- Avoid scripts unless absolutely necessary.
- Do not rely on external fonts loading perfectly.
- Preview on desktop and mobile before publishing.
Step 5: Prepare Images Before Uploading
Images are part of the import process too. AI-generated posts often include image prompts, but not actual publishing-ready image files. Before upload, create or select the images, rename them clearly, compress them, and write alt text.
Bad filename
image-final-v2-987.png
Better filename
ai-content-wordpress-import-checklist.png
Step 6: Build a Pre-Import Quality Pass
Before importing, read the post like a publisher, not like the person who generated it. Look for weak intros, repeated points, fake statistics, missing examples, broken transitions, and sections that sound useful but do not actually teach anything.
Pre-import review questions
- Does the post answer the search intent quickly?
- Is the title clear and clickable without being fake hype?
- Does every H2 add something useful?
- Are there practical examples or only broad advice?
- Are internal link opportunities included?
- Are image ideas and alt text ready?
- Can someone skim the article on a phone?
- Is the CTA relevant to the article?
Advanced Workflow: Turn AI Drafts Into Import-Ready WordPress Posts
The best AI publishing workflow is not “generate and paste.” It is “generate, clean, package, import, preview, publish.” This gives you more control over quality and helps prevent layout problems after the article enters WordPress.
Ask AI for the SEO package, article body, HTML sections, image suggestions, social copy, and final publishing checklist.
Keep metadata, image prompts, and social captions outside the live article body unless they belong in a publishing resources section.
Always preview AI content as a draft first. Check desktop, tablet, and mobile views before scheduling or publishing.
Upload images, add alt text, check internal links, and confirm external links open correctly.
Check the SEO title, meta description, slug, category, tags, intro, FAQ, and call to action before the post goes live.
Common Mistakes to Avoid
- Mistake 1: Importing an article before checking whether the H1, H2, and H3 structure makes sense.
- Mistake 2: Leaving AI notes, prompts, or editing instructions inside the live post.
- Mistake 3: Forgetting to add image alt text and proper filenames.
- Mistake 4: Pasting complex HTML without testing it in a draft first.
- Mistake 5: Publishing AI content without adding examples, opinions, screenshots, or brand-specific insight.
- Mistake 6: Treating the meta description as an afterthought.
FAQ
Can I paste AI-generated HTML directly into WordPress?
Yes, but paste it into a draft and test it first. Use Custom HTML blocks for raw HTML sections, and avoid full-page HTML tags such as html, head, and body inside a normal post.
Should AI content be imported as plain text or HTML?
Use plain text when you want WordPress to handle layout through normal blocks. Use HTML when you need custom cards, styled sections, comparison boxes, or a branded article design.
What should I check after importing AI content?
Check the title, slug, headings, paragraph spacing, links, images, mobile layout, meta description, category, tags, FAQ, CTA, and whether the article feels genuinely helpful.
Can I bulk import AI blog posts into WordPress?
Yes. Bulk workflows usually use CSV, XML, plugins, or developer tools. However, bulk importing works best when every article has consistent fields: title, slug, body, excerpt, category, tags, featured image, and SEO metadata.
Do I need to edit AI content before publishing?
Yes. AI content should be reviewed for accuracy, usefulness, repetition, brand voice, formatting, search intent, internal links, and practical examples before it goes live.
Final takeaway
Preparing AI content for WordPress import is about more than copying and pasting. The winning workflow is to package the article before it reaches WordPress: clean structure, clear SEO fields, organized images, readable HTML, internal links, social copy, and a final publishing checklist. That turns AI from a draft generator into a real publishing assistant.
Before you import your next AI article, build a repeatable checklist. Clean the content once, save the process, and use it every time you publish.
TechnofluxAI
Practical AI for creators and website owners
Learn how to use AI, improve AI search visibility, build smarter workflows, and test what actually works.
Explore our other sites
TimewasterAI
— product reviews, buying guides, and useful finds.
Tina Trends
— fashion, beauty, pets, lifestyle, and fun discoveries.
Mistakenly Delicious
— simple recipes and practical cooking ideas.
Want more TechnofluxAI in Google?
Add TechnofluxAI as a Preferred Source to help Google show you more of our AI guides, tests, workflows, and research.